If you haven’t already, you should definitely consider investing in a grout sealer, even if you’re just going to store it in a shed somewhere. The reason we say this because grout sealers can definitely provide an impressive amount of protection for your floors, thus saving you the hassle of adding grout sealing agents when cleaning your floor or performing any sort of maintenance. That said, let us point out that not all grout sealers can provide the same standard of protection as some are definitely better than others. In this respect, let us find out what are the ten best grout sealers money can buy.
10. Miracle Sealants GRT SLR
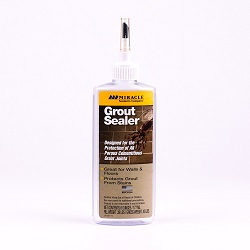
The GRT SLR grout sealer is ideal for exterior and interior applications of any kind. We say this because it is the kind of grout sealer that offers easy-use experience since the package includes an applicator that makes the whole process so much easier. Additionally, its formula is very safe as well as weather resistant, meaning it provides a great level of protection to any exterior surfaces you might be working on.
9. Aqua Mix Grout Sealer
This excellent grout sealer by Aqua Mix uses a quality water-based formula that is resistant to water, acid, and oil-based stains and other dirt. It is actually a best, low maintenance choice, especially if you use it regularly. This sealer is ideal for use on cementitious sanded or un-sanded grout joints in ceramic tile work finishes. Interestingly enough, this sealer can be used either inside or outside as it allows ample vapor loss while maintaining its efficiency.
8. StoneTech High Gloss
This sealer is created to accomplish two purposes — protect your grout by forming a protective seal and give it a high sheen for aesthetic purposes. This is because it features an innovative water-based formula which works superbly in indoor areas to protect surfaces against oil or water-based stains. As such, it is ideal for sandstone, travertine, limestone, slate and, other similar surface types.
7. Serveon Sealants H2Seal H2100
The H2Seal H2100 grout sealer by Serveon Sealants is a great choice that is simple to apply, dries fast, and makes a remarkable seal without requiring several sealants coats. It is formulated to improve the life of the floor material upon which you apply it without causing any long-term damage. However, it does not change the initial surface look but provides protection while not leaving odors, marks. After using it, your stone surfaces will be safe from moisture, stains, molds buildup, and algae for up to 5 years.
6. Homax Jasco Bix 9310
Not only does the Homax Jasco Bix 9310 grout sealer protect grout against stains, soil and mildew stains, it also offers a brilliant new color for a bright, fresh surface look. It is a very effective sealer thanks to its ingenious formula which penetrates deeply as it dries. As such, it forms a great protective layer to your grout as quickly as possible. Despite being among the most affordable sealers, it works just as fast as high-end sealers in more ways than one.
5. Miracle Sealants 511 QT SG 511
From Miracle Sealants, the 511 Impregnator is an original, effective penetrating grout sealer formulated to form protection to any medium through dense porous surfaces. It creates an invisible barrier which is moisture and stain resistant yet allows vapor to escape. However, it is not a surface coating sealer, thus will not change the natural appearance of your surfaces. Instead, it rather makes them less slippery and a bit harder.
4. StoneTech Heavy Duty Grout Sealer
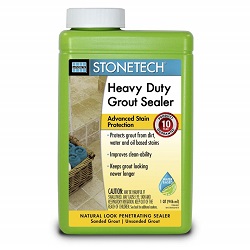
If your house floor is finished with ceramic or porcelain tiles, you can use the StoneTech Heavy-Duty grout sealer to improve their coating. This sealer provides a durable level of protection to such surfaces thanks to its innovative water-based fluoro-chemical formula. When applying this grout sealer, you render the surfaces safe against tough stains, whether oil or water-based. As a result, the grout will get easier to clean and also improve its long-lasting toughness.
3. Aqua Mix Sealer’s Choice Gold
The Sealer’s Choice Gold by Aqua Mix is a premium-grade, natural look, no-sheen, water-based penetrating grout sealer created to offer optimum stain protection, particularly in kitchens and dining rooms surfaces. This grout sealer is suitable for use for both exterior and interior applications. Its formula allows vapor transmission for excellent natural-looking results, and it is usable as a pre-grouting sealer.
2. Tuff Duck CECOMINOD068551
This is another great grout sealer with an effectively penetrating formula to leave your floor natural finish unchanged yet somewhat improved. It offers optimum protection for any natural stone surfaces while improving their overall toughness. It is specially formulated with advanced water-based fluoro-polymers to provide protection from the toughest water and oil-based stains. We should also point out that it works well for marble, limestone, granite, slate, sandstone, travertine, terrazzo and any porous surfaces.
1. Mapei Light Almond
Although known as a grout refresh, this Mapei product can excellently provide sealing properties as well. In fact, it is seen as one of the best if you need to color the grout as well as protecting it long-term. As such, if you need your grout to assume an impressive new color while you seal it, then perhaps the Mapei Light Almond might be of help. Furthermore, this sealer comes in several color options to select from, including Charcoal, Light Almond, Chocolate, Mocha, Sahara Belge, Bahama Belge, Gray, and more.
How To Use A Grout Sealer
Once you have gone through our top ten list of the best grout sealers and have purchased the one that best suits your needs, it’s now time to put that sealer to good use. And to do that, you are going to have to take the time to read the product’s instructions and take the time to seal the grout properly. To help you use your grout sealer properly, we wrote the following guide that we hope is quite useful.
Step One: Read Instructions
Even though we just stated in the above paragraph that it’s important to read the instructions on your grout sealer, we feel that it’s worth repeating here. If there’s anything that you come away with from reading this article, it should be this: Make sure that you read and follow all the instructions on your grout sealer—particularly, the sections on safety. To not read or follow the directions is merely setting yourself up for failure, so make sure that you take this step seriously.
Step Two: Gather The Equipment You Need
The next thing you need to do before you begin to seal your grout is to gather up all of the equipment that you’re going to need to get the job done. Generally speaking, this usually includes things like safety equipment meant to protect your skin from these products, but it also means additional tools that could make the process of applying the grout sealer a lot easier. Below is a shortlist of some of the items that you need and/or may find useful when using a grout sealer.
- Nitrile Gloves
- Knee Pads
- Paper Towels or Lint-Free Cloth
- Grout Brush
- Grout Cleaner
- Paint Brush
Step Three: Clean Your Grout
Okay, the next step that has to be done before you can seal your grout is to clean it. Make sure that you use your favorite broom or shop-vac to remove all of the debris off of the floor, and then when that’s done, go ahead and grab your favorite grout cleaner to use. Although some people use just any old household cleaner to clean their grout during this process, we find that a real grout cleaner provides better results. There are quite a few great grout cleaner brands on the market nowadays including Black Diamond, Granite Gold, And Rejuvenate, so be sure you use one that you feel confident in using. Once you’ve secured your cleaner, follow the directions on it, and then use it and your grout brush to remove all of the dirt off the grout’s surface. After that, you merely have to wait for the tile grout to dry. Of course, if you’re in a big hurry, you don’t have to just sit idly by. Instead, you can speed the process up by having a fan blowing over it.
Step Four: Tape Off Surfaces
Before you begin the grout sealing process, it’s usually a good idea to tape off the areas that you don’t want to come in contact with the sealer. This includes baseboards and metal finishes that you want to avoid getting sealant on. Once you’ve taped off those areas using painter’s tape, look over everything one more time before you begin sealing your grout to make sure that you didn’t miss any spots. When that’s done, it’s time to seal the grout.
Step Five: Seal Your Grout!
With the floor properly cleaned and dried, it’s now time to begin the actual sealing process. Make sure that you place your nitrile gloves on to protect your hands and place the sealant in an applicator bottle if that’s the method you choose for applying the sealant. If you’re using a sealant that comes in a trigger bottle, then be sure to spray it on the grout evenly and according to the label’s directions. If you’re using a product that has to be applied with a brush, then be sure to apply the product to the grout evenly for the best results. No matter which way it’s applied, however, your goal should be the same. It should be to cover the grout completely from the tile edge to the tile edge.
If you happen to spill any of the sealants onto the tiles themselves, be sure to wipe it up as quickly as possible using your paper towels or microfiber cloth. You’ll want to make sure that you clean it up before it dries on the tile, because if it does, then you’ll have a real mess on your hands. When the tile grout begins to darken and takes on a wet look, then you know that you have applied enough sealant to it.
Step Six: Apply A Second Coat & Allow It To Dry
Once you’ve finished doing all of the grout, it’s time to give it time to dry before applying a second coat. It’s usually best to wait for 30 to 60-minutes before applying the second coat, but be sure to follow the directions on your specific sealant’s label to be sure. After 2-3 hours, the surface of the floor should be able to tolerate traffic, and after about 12-hours you’ll be able to mop it in most instances. After a full 24-hours, the tile grout should be completely dry and can be used as normal. Congratulations! You have just sealed your grout.


